
Preflop Ranges and Charts: Learn Them by Position
You sit down at a six-max table, look at your two cards, and freeze for half a second. That half-second is the tell. preflop ranges exist to remove it — a fixed answer, for every seat and every hand, decided long before the cards hit the felt. I taught math before I taught poker, and the parallel is exact: a formula you cannot recall under exam pressure was never learned, just seen. The same is true of a range you have to think about at the table. This page gives you the applied layer — RFI, 3-bet, and defence numbers by position and stack — plus a method for making them automatic. If you want the theory behind why these numbers look the way they do, that lives on our poker ranges page; if you want to know why the button opens 50% of hands and under the gun opens 15%, that's covered on our position in poker guide. Some players run a solver-trained assistant like NZT Poker to check spots against a model in real time — worth knowing about, though it changes the risk profile of your account, not just your decisions, so treat it as one option among several rather than a shortcut through the work below.
What Preflop Ranges Actually Look Like on a Chart
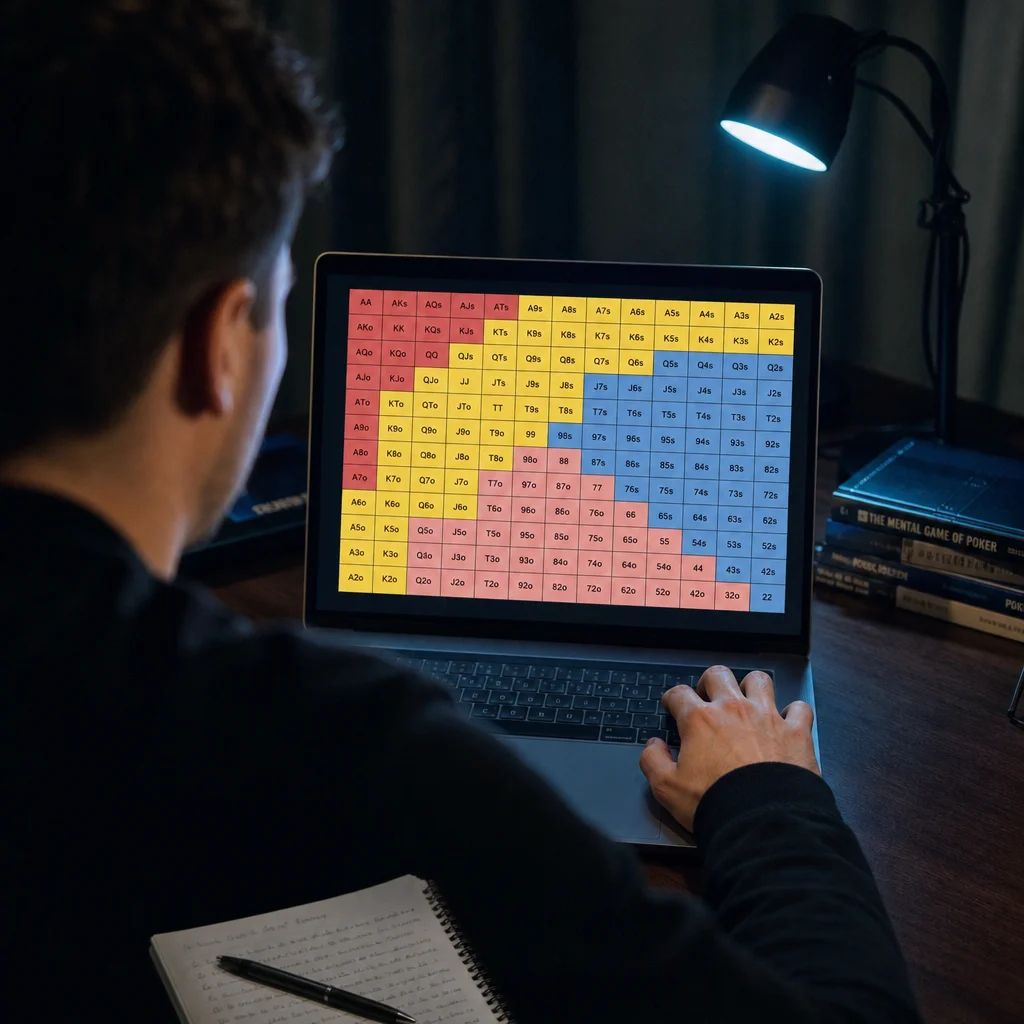
A preflop chart is a 13-by-13 grid, one cell per starting hand, colored by action. Raise-first-in hands sit in one color, calls in another, folds left blank. preflop charts compress an entire position's preflop ranges into a shape you can screenshot and glance at between hands. That's the whole appeal of studying preflop ranges this way — you're not solving anything at the table, you're matching a pattern you already memorized against a picture you've seen a hundred times.
Take 98o from under the gun in a six-max game. It looks live — two decent cards, some straight potential — but it's a clear fold from that seat: a mediocre kicker, first to act, five players still behind you who can wake up with a real hand. If your first instinct was to raise, that's the exact gap this page closes.
RFI Ranges by Position and Stack Depth
Raise-first-in, or RFI, is your opening range when the action folds to you — the base case every other preflop range gets built from. At 100 big blinds six-max, opening ranges poker players use widen steadily as you move right around the table: under the gun opens tightest, the cutoff and button open widest, and the blinds sit in a category of their own because nobody's left to act behind them. rfi ranges shift with stack depth too — shove-or-fold zones below roughly 25bb, and standard raise-sizing above it — so the chart you memorize has to specify the stack it assumes.
I won't hand you a decimal frequency from memory and pretend it's gospel — solver output for a single spot depends on rake, ante structure, and opponent pool, and quoting a number to the tenth of a percent without the solver in front of me would be theater, not teaching. What holds steady across setups is the shape of these preflop ranges: tight up front, wide on the button, a distinct blind-vs-blind category. Build your memory around that shape first, then let a trainer fill in exact cutoffs for your specific preflop strategy. (see Texas hold 'em).
6-Max RFI, Cutoff, 100bb
| AA | AKs | AQs | AJs | ATs | A9s | A8s | A7s | A6s | A5s | A4s | A3s | A2s |
| AKo | KK | KQs | KJs | KTs | K9s | K8s | K7s | K6s | K5s | K4s | K3s | K2s |
| AQo | KQo | QJs | QTs | Q9s | Q8s | Q7s | Q6s | Q5s | Q4s | Q3s | Q2s | |
| AJo | KJo | QJo | JJ | JTs | J9s | J8s | J7s | J6s | J5s | J4s | J3s | J2s |
| ATo | KTo | QTo | JTo | TT | T9s | T8s | T7s | T6s | T5s | T4s | T3s | T2s |
| A9o | K9o | Q9o | J9o | T9o | 99 | 98s | 97s | 96s | 95s | 94s | 93s | 92s |
| A8o | K8o | Q8o | J8o | T8o | 98o | 88 | 87s | 86s | 85s | 84s | 83s | 82s |
| A7o | K7o | Q7o | J7o | T7o | 97o | 87o | 77 | 76s | 75s | 74s | 73s | 72s |
| A6o | K6o | Q6o | J6o | T6o | 96o | 86o | 76o | 66 | 65s | 64s | 63s | 62s |
| A5o | K5o | Q5o | J5o | T5o | 95o | 85o | 75o | 65o | 55 | 54s | 53s | 52s |
| A4o | K4o | Q4o | J4o | T4o | 94o | 84o | 74o | 64o | 54o | 44 | 43s | 42s |
| A3o | K3o | Q3o | J3o | T3o | 93o | 83o | 73o | 63o | 53o | 43o | 33 | 32s |
| A2o | K2o | Q2o | J2o | T2o | 92o | 82o | 72o | 62o | 52o | 42o | 32o | 22 |
Illustrative cutoff opening shape at 100bb — widen further on the button, tighten one full step under the gun.
3-Bet Ranges: Value, Bluffs, and the Mix Between
A 3-bet range is your re-raise over someone else's open, and it does two jobs at once: it takes value hands that want to build a bigger pot, and it takes a smaller slice of hands that don't want to just call and play a bloated pot out of position. Against a button open, a big blind 3-bet range typically pairs strong broadways and big pairs with a handful of suited connectors and a few suited aces — the value end punishes a wide opener, and the bluff end has the equity to survive when called.
The always-do rule here: when you're out of position and unsure whether a hand is a 3-bet or a fold, it's a fold. Flatting out of position with a marginal hand costs you the initiative and the ability to see a clean flop; that shortcut costs you edge cases where a strong flat would have out-earned a 3-bet, but it removes the far bigger leak of bloating pots you play worst. Take the trade.
Defending Against a 3-Bet: What to Continue With
When your open gets 3-bet, the question flips: what do you continue with, and how? Against a tight 3-bettor you can fold more of your bluffs and keep your value tight and strong; against a loose one — someone 3-betting 12%+ from the blinds — your continuing range should widen, because a wider 3-bet range simply contains more hands you beat.
Stack depth matters here more than almost anywhere else in the tree. At 40bb, a 4-bet often commits you to the pot, so many of your continues become shove-or-fold. At 100bb-plus, you have room to call and play a real flop, which brings suited hands and lower pairs back into your continuing range that would otherwise be automatic folds.
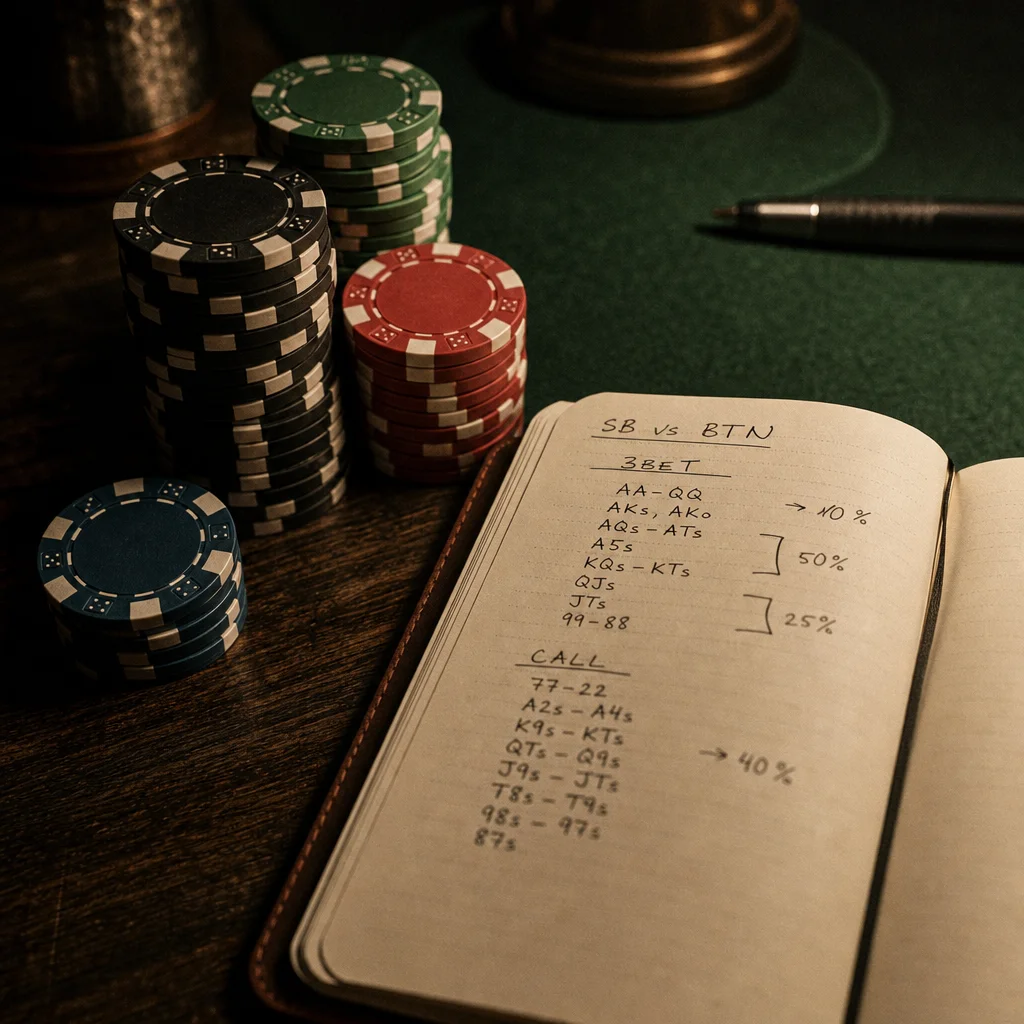
How to Actually Memorize These Charts
Staring at a static chart doesn't build recall — testing yourself does. Split the grid into blocks: pairs, suited aces, suited broadways, suited connectors, offsuit hands. Drill one block at a time with flashcards or a trainer, and don't move to the next block until you can answer the current one without pausing. That pause is exactly the half-second freeze from the opening of this page, and it's the thing you're training out.
I ran study groups on this exact method back when solvers first became affordable enough for a group to split a subscription — one output, a dozen players arguing over what it meant, and the ones who actually improved were the ones who quizzed each other on their preflop ranges instead of just reading the chart. Some players layer a solver-based checker into live play to catch mix-ups while the habit sets in; a tool like NZT Poker's GTO bench is one way people do that, though it carries real account-safety terms you should weigh against a room's rules before relying on it, and it won't build the recall a flashcard drill does. A preflop range chart by position pdf pinned next to your monitor works for the same reason flashcards do — repetition against a fixed reference, not repeated lookup during the hand.
Reading a Preflop Chart Without Getting Lost
Every chart uses the same grid logic: pairs run down the diagonal, suited hands sit above it, offsuit hands sit below. Color usually maps directly to action — raise, call, mixed, fold — and a mixed cell means the solver splits that hand between two actions at a specific frequency rather than always doing one thing. A gto preflop chart built this way isn't rounding for convenience; the mix is the actual solved answer. Don't round a mixed cell to whichever action looks bigger; treat it as a signal that the hand is genuinely close, and default to the simpler of the two actions until you have a specific reason to mix.
Reading Tip
None of this replaces table time. A memorized set of preflop ranges tells you what a solver would do in a vacuum; your job is to notice when a specific opponent's tendencies make the textbook play wrong, and that judgment only comes from repetition. Start with RFI, add 3-bet ranges once RFI is automatic, then layer in defense. Rushing the order is the most common reason players quit a preflop strategy halfway through and go back to guessing.
Want a Solver Check Alongside Your Charts?
NZT Poker's GTO bench is one option worth exploring if you want a live cross-check against solver logic.
Explore NZT Poker's GTO BenchDisclosure: This page contains affiliate links. We may earn a commission at no extra cost to you.